
This tutorial is created by Amanda Carter July 24th, 2011. This tutorial is my own creation so please don't copy and claim as your own. A link back is appreciated if you use it in your forums/groups. Thank you.
Chances Are Tagger PTU Tutorial

Supplies needed:
PSP Program
Plugins- Eye Candy 5 Impact Extrude
Scrapkit Chances Are Tagger by BabyVDezign,this is a PTU and can be bought here.
Mask number 366 can be found here
Font of choice:Kozuka Mincho Pro L
Tube of choice, I am using FTU Moonlight Serenitas by Ann Rigby which you can find her website here
Now let's begin:
Open a new image 400x400 transparent.
On a new layer flood fill a color of choice, I am picking a nice blue from the tube.
Open mask and apply your mask.
Layers merge group. Increase the size of the mask.
Open Frame2 and resize to about 15 percent. Copy and paste as a new layer. Move to the left side of the tag. Duplicate, image mirror. Merge down and then resize again about 95 percent this time.
Pick a paper from the kit, I picked paper 4.
With your wand, select your frames and paste the paper into selection, then select none.
Now resize your tube to your liking and put it in the frame, duplicate your tube and then image mirror and place beside the other tube.
Now add some elements, you can do mine as followed:
Butterfly 1 resize by 35 percent and place somewhere near the frame then image duplicate and mirror.
Flowerstamp 2 and place between the two frames.
Heartpillow resize by 35 percent and place somewhere near the bottom of the image duplicate and then image mirror.
Now go to the bottom of the layer where your mask is and place the bubbles on the mask. Rotate as seen on image using your pick tool, and then duplicate and image mirror then merge together.
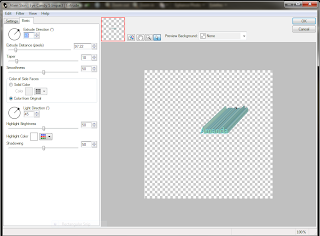
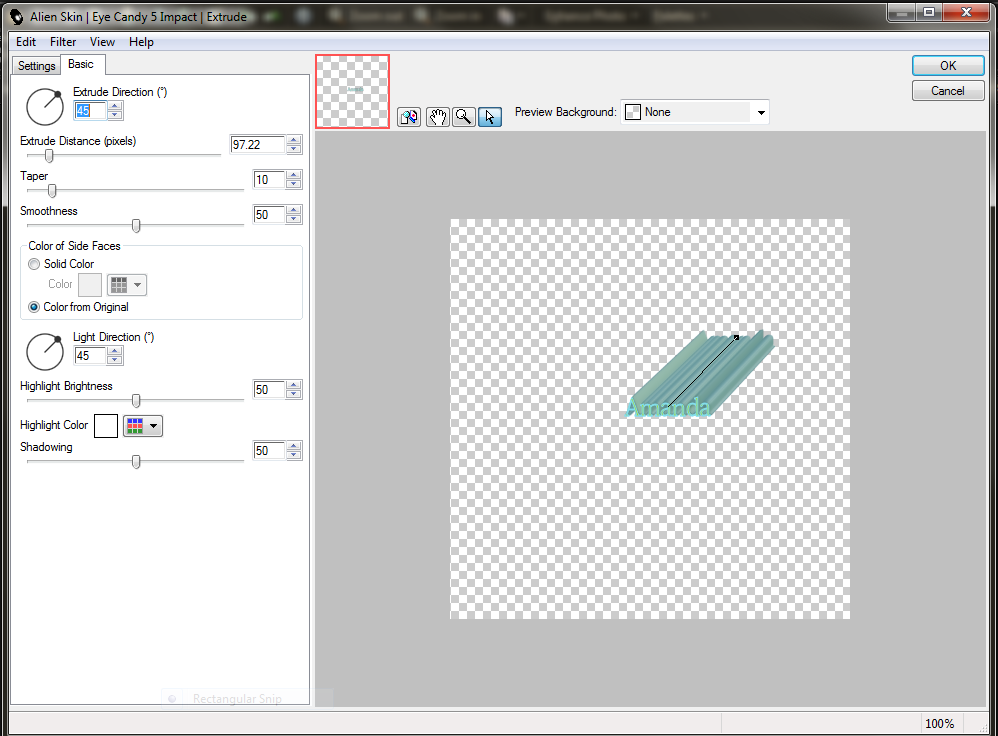
Now place your name, using colors from the image and place where it can be seen, and then use eye candy 5 impact Extrude with these settings:
Chances Are Tagger PTU Tutorial

Supplies needed:
PSP Program
Plugins- Eye Candy 5 Impact Extrude
Scrapkit Chances Are Tagger by BabyVDezign,this is a PTU and can be bought here.
Mask number 366 can be found here
Font of choice:Kozuka Mincho Pro L
Tube of choice, I am using FTU Moonlight Serenitas by Ann Rigby which you can find her website here
Now let's begin:
Open a new image 400x400 transparent.
On a new layer flood fill a color of choice, I am picking a nice blue from the tube.
Open mask and apply your mask.
Layers merge group. Increase the size of the mask.
Open Frame2 and resize to about 15 percent. Copy and paste as a new layer. Move to the left side of the tag. Duplicate, image mirror. Merge down and then resize again about 95 percent this time.
Pick a paper from the kit, I picked paper 4.
With your wand, select your frames and paste the paper into selection, then select none.
Now resize your tube to your liking and put it in the frame, duplicate your tube and then image mirror and place beside the other tube.
Now add some elements, you can do mine as followed:
Butterfly 1 resize by 35 percent and place somewhere near the frame then image duplicate and mirror.
Flowerstamp 2 and place between the two frames.
Heartpillow resize by 35 percent and place somewhere near the bottom of the image duplicate and then image mirror.
Now go to the bottom of the layer where your mask is and place the bubbles on the mask. Rotate as seen on image using your pick tool, and then duplicate and image mirror then merge together.
Now place your name, using colors from the image and place where it can be seen, and then use eye candy 5 impact Extrude with these settings:
Now that were done with this add your credits,watermark, merge together and save!!!
Thanks for doing this tutorial.
No comments:
Post a Comment