Thursday, October 21, 2010

PTU Marital Bliss

This tutorial was created by Amanda Carter in October 21, 2010.  Anything in this tutorial that is similar to another is pure coincidence.  Thanks for trying this tutorial.
Paint Pro Shop X2 (Any version probley would do)
3 tubes or images of choice (I used one pick from my wedding)
Template number 29 by Tracy you can find it here
Mask number 1 by Scraps Dimensions located here
PTU Scrapkit by Kim's Korner you can get here

Open your template and delete the credit layer.
Highlight the grey rectangle layer, select all, float, defloat and invert, then pick a paper from the scrap kit.
Copy and paste as a new layer and then hit delete, and then merge down.
Highlight the brush layer, select all, float, defloat and invert, then again pick a paper from the scrap kit and then copy and paste as a new layer and hit delete and then merge down.
Then highlight the rectangle layers and do the same but after that stay there to add your images/tubes.
Now use your wand and select each rectangle one by one and put in your images/tubes, then merge down until together.
Now click on the frame layer, select all, float and then flood fill with a gold color (#808000) select none and then inner bevel of choice.
Close out the word art.
Highlight your large heart, select all, float, defloat and then invert, then pick a paper and hit delete.
Do the same to the other large heart.
Select the small heart and do the same as above except use a different paper.
Do the same as above.
Now it is time to put in some elements of choice, I used.
Ruffledheart1 resized by 30, and then duplicated to the other side.
The floarswag2 and then to resize to fit the middle rectangle.
Now add your name and the copyright information and then you’re done.

Wednesday, October 20, 2010

PTU Rock It

This tutorial was created by Amanda Carter on October 20, 2010.
Any other tutorial that looks like this is just coincidence, all ideas are my own.
Thanks for trying my tutorial, so let’s get started.

Paint Pro Shop X2 (any version would do)
4 tubes of choice (I used Popeye Wong’s you can find his tubes at http://popeyewong.com)
Scrap kit Rock It by Rebellious Scraps, you can buy her kits at http://scrappindollars.com
Mask by WSL which can be found at weescotslass creations: Masks
No outside filters were used in this tutorial.
First open a 500 x 500 transparent new image, flood fill white; this will be your background.
Go to the scrap kit and open frame 1 and paste as a new layer.
Use your magic wand and select each frame, go to selections, modify and expand by 4.
 Open paper 3, copy and paste then hit invert, then delete, put the paper under the frames.
Highlight your frame layer and once again using the wand put the tubes of choice in each of the frames, making sure the tube you are using is inside the frame, then move each layer under the frame layer, just like the paper layer your gonna have to invert and delete.
Then you’re going to merge down all tubes and the frames making all of them one, merge the paper and the frame together also.
Then highlight your background layer and pick a paper from your scrap kit, and paste as a new layer (I used paper 1)
Apply your mask, then merge group.
Add some of the elements from your scrap kit; you can follow mine as an example.
I used disc 1, resize by 45%, and then place in the middle.
Then I used heart 1 and placed them on the other 2 frames, try to resize the heart by 25%, duplicate and then image mirror.
Add your name on a new layer; using the font of choice (I used Forte, size 22, using colors #4f9cba, and #ff058c).
Add your watermark copyrights and then merge visible and then you’re done, thanks again for looking at me tutorial.

Monday, October 18, 2010

PTU Remember Last Summer

This tutorial was written by Amanda Carter on October 14, 2010.  Any part of this tutorial that looks like someone else is pure coincidence

Supplies needed

A tube of choice (I used red by Andrea Young)
You can see her tubes http//:Andreayoungdesigns.com
Vix Mask 97 located here
Template Aloha can be found here
Scrap kit of choice I used Remember Last Summer by Scrap Wishes.
Font of choice.
Ok let’s get started.
Open your tube and minimize.
Open your template and delete the credits.
Highlight your backgrounds select all, float and defloat, open paper 1 and paste into selection, apply mask 97.
Merge group and resize to your liking.
Click on the square frame, select all, float, defloat and then invert.
Pick one of the papers from your scrap kit (I picked paper2), paste as a new layer and then hit delete and then deselect.
Merge down.
Do the same for all of them until you get to the large word art.
Click on the lrg wordart, float and defloat and pick a paper or color from your tube and fill the word art.
Then dropshawdow your word art I used the settings V-2, h-2, Opacity 50, blue 6 color black.
Close out the small word art.
Flood fill the palm tree to your liking.

Now were gonna add the tube, I am adding my tube to the middle of the frame.
Dropshawdow your tube.

Add elements of choice, your name and the credits and then you’re done.

Thanks for trying my tutorial.

Sunday, October 10, 2010

Check out this new collab at Enchanted Dreams Boutique

This brand new collab is made by several talent artist that I personally love to work with. If your interested in this collab you may buy it here, preview below

Saturday, October 2, 2010

FTU Bewitched

Supplies I used:
Candy’s Treats Scrap kit called Bewitched FTU can be found here
Vix Mask number 0903 which can be found here
Tube used is by Popeye Wong titled first row to back seat which can be found at his website at seriously... who the Hell is Popeye Wong?
Font of choice.
Ok let’s get started
Create a transparent image 600x600.
Select all and open paper number 10, then copy and paste into selection.
Select none and apply mask 0903.
Layers merge group.
Open frame 3 and paste as a new layer.
Use magic wand and expand by 3, then hit invert.
Copy and paste paper 8 as a new layer and hit delete.
Paste your tube so it looks good near the frame.
Reselect your frame.
Use your wand and pick an element and place inside your frame.
Invert and then go to your element and hit delete so it is inside your frame and then deselect.
Click on one of the bows and put it on top of your frame. (You might resize a little bit)
Merge visible and add your credits, copyright and name.

Thanks for doing my tutorial.  This tutorial was created by Amanda Carter
Any parts that looks like another tutorial is pure coincidence.

Friday, October 1, 2010

Along the Grapevine PTU

Along the Grapevine 


Supplies used:
Template #6 located here
Scrap kit by Jen called Along the Grapevine and can be bought here
Tube of choice
Open Template #6 and remove copyright.
Select Rectangle back, select all, float, defloat then invert.
Select a paper from the scrap kit (I used paper 1)
Copy and paste paper on a new layer and hit delete then merge down.
Select rec1 and do the same as above with different paper (I used paper9)
Continue doing this with all the layers using different papers.
Once doing that select Stalkers Rule select all, float and defloat then flood fill with green (I used color# 93c94f), then select none and drop shadow it.
Highlight Rec2 and put your tube in it by select all, float,defloat, invert, then copy as a new layer and hit delete. Then duplicate twice and place the tubes in the rest of the rectangles.
Add name and copyright and you’re done.

Thanks for doing my tutorial
Any similarities to this tutorial is coincidence and created by Amanda Carter

Thursday, September 30, 2010

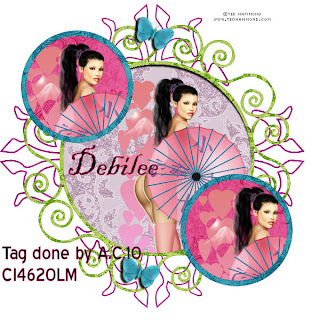
Happy Days PTU

This tutorial was created by Amanda Carter. Anything that looks like this tutorial is by pure concidence.


Mask by Deanna found at http://bkpspworld.blogspot.com/2010/08/masks-71-75.htmlhttp:/bkpspworld.blogspot.com/2010/08/masks-71-75.html


Template #5 found at http://bkpspworld.blogspot.com/2010/05/templates-4-5.html


Tube of choice I am choosing Geisha by Ted Hammond and you can buy his tubes at http://www.cilmstore.com/


Open template number 5.


Delete copyright.


Select the Circle, go to select all, float, defloat and invert.


Go to Happy Days scrap kit and select paper 1, copy and paste as a new layer, then hit delete. Select none and then merge down.


Select the frame and go to select all, float, defloat and then invert.


Open paper 2, copy and paste as a new layer and then hit delete, select none then merge down.


Then go to adjust and add noise, guassin, monochrome checked 15.


Go to circle bottom, float, defloat and invert.


Copy paper 4, paste as a new layer, hit delete again select none, and merge down.


Do the same as above for Lil Top Circle.


Select lil bottom frame, select all.


Then we are going to float, defloat and invert.


Open paper 3, copy and paste as a new layer hit delete, select none, merge down then go to adjust add noise.


Do the same as above for lil top frame.


Now that we have the colorization outta the way it is time to add your tube/tubes.


Click on the lil circle top, select all, float, defloat, modify and expand by 3 then invert.


Copy and paste your tube making sure the face is showing in the circle then hit delete, drop shadow the tube with these settings: Vertical-4, Horizontal- -4, Opacity 85, Blur 3.0 and the color black. Merge down.


Do the same for the lil bottom circle.


Merge down both of the small circle frames.


Select circle and hit select all, float, defloat and then invert. Copy and paste your tube and hit delete. Select none, drop shadow, merge down.


Now it is time to add the mask.


Go to the Background and select all, float, defloat. Pick one of your papers. I used paper 6. Copy and paste into selection then select none. Go to mask and pick number 11 then merge group.


Pick elements of choice. I picked butterfly 1 and put in on the top and bottom with a drop shadow. Rotate them a little bit to your liking.


Now add your name (color of your tag), copyright, and then you’re done.


Thanks for doing my tutorial.

Tuesday, September 28, 2010

Boo Time- PTU


This tutorial was written September 27th, 2010, by Amanda Carter.   Any resembles to other tutorials are pure  coincidental.  I am using the artwork of Ayumi.K.  You can find his artwork at http://areyoume.net/

Supplies:
Tube of choice
Eye Candy 4000 (optional)
Scrapkit: PTU Boo Time you can find here
font: Pumpkinese found here
Template #45 found here

Open template #45.
Delete the copyright.
Open Boo time kit and chose paper number 2.
Select background, select all, float, defloat and then invert.
Copy paper 2.
Paste as a new layer and then hit delete.
Select none.
Merge down.
Select Raster 1, go to Select all, float, defloat, invert.
Click on paper 4 and copy.
Paste as a new layer and hit delete.
Select none merge down.
Click on Raster 2 and select all, float and defloat, then invert.
Select paper 3, copy and paste as a new layer then hit delete select none.
Again merge down.
Select Raster 3, go to select all, float, defloat, invert.
Open paper 1, copy and paste as new layer and hit delete, select none and then merge down.
Select Raster 4, select all, float and then defloat and flood fill with an orange color (I used #f16420).  Select none.
Select Raster 5, select all, float and then defloat and flood fill with an yellow color ( I used #ffff00, make sure all is filled in), then select none.
On Raster 6, select all, float and then defloat and use the flood fill to fill in the stars using the same color as above.
I then used eye candy 4000 gradient glow with these settings.  Glow width 13.02, Soft corners 25, Opacity 100, Color yellow and use the thin version. (This is optional). Then select none, and merge down.
Ok now that we have colorized our template now it is time to add your tube.
Copy and paste tube, resize if needed, then erase any part of the tube showing out of raster 3.

Add copyright (also license number if using a PTU artist along with website).
Time to add the elements.
Click on black cat 2 and resize by 50%, the copy and paste on left side of the background. Layers duplicate, move to the other side.
Click on bow 1 and resize, paste on top and then duplicate layer and put one on the bottom.
Click on bulb1 and resize by 50% twice, then copy and place the bottom right.

We are now going to add our names and credits.  You can use the eye candy gradient glow again if you like. You can use Pumkinese and any color of your tag.

Thanks for doing my first tutorial I hope it was a nice and easy one for you.