Monday, September 26, 2011

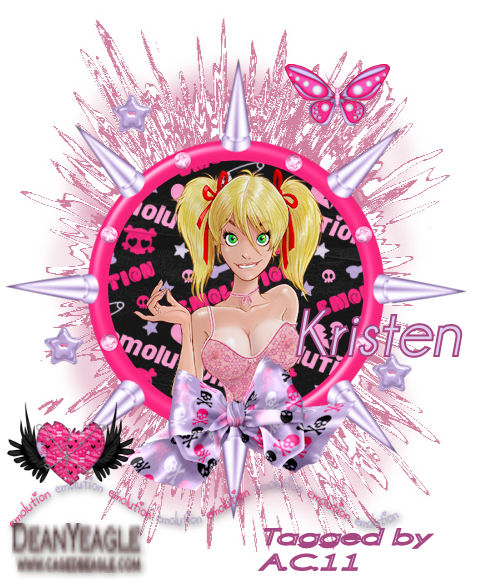
PTU Emolution 5

This tutorial was written by Amanda Carter, please don't rip apart or claim as your own.  All ideas are of my own. I would love to see your work so please either write me or post it in the group so I may showcase it on my blog.


Let's get started:

Supplies needed:
A graphic program of choice (I am using Paint Pro Shop X3, but others should work fine with it)
Frame 1 from kit
PTU Scrapkit Emolution 5 can be purchased at http://scrappindollars.com/, must be purchased to use.
Mask of choice I am using a grunge mask by Pinkrose found at http://creativemisfitscreations.blogspot.com/2009/11/grunge-masks.html
Font of choice I am using Accents found at http://www.dafont.com/theme.php?cat=501
Tube of choice, I am using Dean Yeagle's Mandy in Pink and can be purchased at http://www.cdoestore.com/, do not use if you don't have a license number to do so.


Open Paint Pro Shop, with a new image about 500 x 600, you may crop later if desired.
Flood fill with color of choice I am using a pink from my tube.
Open your mask and apply it to your background then merge group.
Open frame 1 and resize to about 70%.
Now using your magic wand click inside frame, modify and expand to about 4, then pick a paper, invert and delete any that hangs outside of the frame. (I picked paper5).
After doing all this, move your paper under the frame and then do the same thing you did with the paper for the tube.
Now open the wordart found in the element section of the kit and resize to your liking and drop shawdow it to whatever you think looks good.

Now the elements:
Bow 5 resize to about 50 percent and place somewhere on the bottom.
Butterfly 1 resize to about 20 percent and put on the left top corner.
Open barbed heart and resize to 20 percnet and place on the bottom right corner.
Now open the star button and resize to 20 percent and place somewhere around the frame, duplicate 2 more times and place around the frame.
Now add your text and your copyright information, and merge together and your done.

Thanks for doing this tutorial.
Sunday, September 18, 2011

PTU Baby I love you!!!

This tutorial was written by Amanda D.Carter. Please don't rip apart or claim as your own. I would love to see your work so you can be recognized!!!


Supplied needed:
Scrapkit of choice, I am using PTU Baby I Love You by Blackwidow Creations and you can purchase this beauty at http://undergroundscraps.info/.
Font used Ornamental Versals found at this site http://www.abstractfonts.com/font/15336
Tube of choice I am using a Pinuptoons found at http://www.cdoestore.com/#
Frame used number 1 from kit.
Mask of choice, I am using number mask number 5, from set 1 by Cat found here.

Now let's begin our tutorials.

Open psp.
Open new image 700x450.
Flood fill with white.
Open frame 1 from your scrapkit and resize to about 70 percent, select inside frame and go to select all,float and then defloat, then insert paper of choice and then invert delete, then add your tube.
Now add a new layer and then select all and insert another paper of choice, and merge group.
Add some elements, if you wanna make it like mine this is what I used...

Bow 1 resize to about 80 percent
Doodle 3 put right about mask
Flower 1 resize to about 75 percent
Heart 3 resize as desired
Rose4 to your liking

Now add your name using desired font and size, and color and then add your credits and your done.

Thanks for trying my tutorial!!!


Wednesday, September 14, 2011

PTU Simply Irresistible

This tutorial was written and composed by Amanda Carter. Please don't rip apart this tutorial and claim as your own.  I would love to see your work so please either post the results in the group or e-mail me personally and I will add them to my blog.  Now let's get to work.


Supplies needed:
Paint Pro Shop
PTU Scrapkit titled Simply Irresistible by Jen's Sweet Temptations, you can purchase this scrapkit at Enchanted Dreams Boutique.
Mask of choice, I am gonna use is WSL number 353 located here
font of choice, I am gonna use Franklin Goth
Template number 2 found at http://freebiefriendsscrapsandmore.blogspot.com/
Tube of choice I am using psp0219-SCVonLind-Felicity by Baron Von Lind at http://www.mypsptubes.com/index.php?p=catalog&mode=catalog&parent=301&mid=0&search_in=all&search_str=&pg=2, which is free to use.

Now let's get to work:

Open Paint Pro Shop and your template.
Now hit shit+D and make a copy of your template.
Now delete raster 6 and copyrights.
now go to raster 1 select all, and then go to your papers and copy and paste into selection number 1 paper.
Select none and then apply your mask.
then merge group, now close your mask and resize your canvis to about 500 in width.
Now select raster 2 and select all, float and then defloat, and paste a paper in the selection.
Do the same with the copy of raster 2 and the raster 4.
Now we are gonna go to raster 3 and do the same thing only hit invert delete and then select none. (With different color paper this time)
Now do the same with Copy of raster3, and the other oval.
Now do the same with the leaves only use a green color and flood fill it.
Now reselect your oval and then select all, float and then defloat andthen copy and paste your tube, earasing anything outside the tube.
Then select none.

 Add elements of choice,
If you wanna copy mine please use the tag as reference where to put them.
I used:
BFLy1 rsize to about 20 percent and then image duplicated, image mirror.
then flower8 resize to liking.
Then shoe1 resize and place like mine.

Then add your name with the fontFanklin Goth size about 20, with colors from the tag and then add your license number and other credits and your done.

Thanks for doing my tutorial.


Tuesday, August 23, 2011

Summer Magic

This tutorial was written by Amanda Carter on August 23rd,2011. This tutorial is also copyrighted by me so please don't claim as your own. A link back is appreciated if used in forums.  This tutorial also requires some tool knowledge in your graphic program.

opSupplies needed:
A Graphic Program of choice ( I am using Paint Pro Shop X3), but any will do
FTU Scrapkit Summer Magik by Scrappin with Lil Ole Me, you may get this free scrapkit at http://heartbeatzcreationz.com/index.php?main_page=product_info&cPath=1_231&products_id=9893
Frame of choice ( I am using the frame from the scrapkit)
Mask number 176 by weesscotlass, can be downloaded at this site http://weescotslasscreations.blogspot.com/search/label/Masks
font used Janda Curlygirl Chunky at dafont.com, go here to download
Tubes of choice I am using U-2 PinupToon Farmgirl  and N-6 by Pinuptoons, this a one you have to purchase to use and you may find it at the CDO Store located here
Plugins used Xero-Lithograph
Now let's begin our tutorial..
Open a new image 700 x 600 (we will crop later if needed).
Open your scrapkit and find the frame2, copy and paste as a new layer and resize to 80%.
Now using in your wand select inside frame and expand by 5.
Now open paper 1, copy and paste as a new layer, then invert delete and then move under the frame later, then deselect.
Now using your magic wand again select the frame again and place your tube inside it.
Then go to invert delete and then set it to luminance, then deselect.
Now your gonna add your second tube on the outside of the frame just like it is shown above.
Now we add some elements....
Open element bow 3, copy and paste as a new layer and resize to about 20 percent and place on the frame, add a drop shawdow.
Now add some beads around the frame(these beads can be of your own choosing, and remember to drop shadow)
Now add your text and then we will use the plugin, with these settings above.

Now merge visible and crop, when your done cropping add the credits and the proper copyright and yur done.

Thanks for doing this tutorial, any questions feel free to e-mail me at carter_mandy@bellsouth.net


Sunday, August 14, 2011

My First mask

this is my first mask I have ever done hope you like it, if you want to use it you can right click and save.

PTU Waking Up In Vegas

This tutorial was written by Amanda Carter on August 15th,2011. Any resemble to others are pure concidence.  Using this tutorial requires some knowlege of your program.  Please don't claim or copy, a linkback is appreciated.

Supplies needed:
A Graphic alterning program (I am using Paint Pro Shop X3)
Mask number 353 by weesscotlasscreations found here
Scrapkit PTU Waking Up In Vegas by Kim's Korner you can purchase at enchanteddreamboutique,,located at this website http://enchanteddreamsboutique.com/index.php?main_page=advanced_search_result&search_in_description=1&zenid=ae8fb3b41ba1f8b45f9e3adc9afd6e56&keyword=Waking+In+Vegas, also go ahead and download the freebie that goes with it.
The Frame I used is from the scrapkit and we will be using numer5
Font used Passions Conflict ROB size 25 found at this sitehttp://www.searchfreefonts.com/font/passions-conflict-rob.htm
Tube found at DragonLairTubes, must be a member to download, you can join this yahoo group at this link http://groups.yahoo.com/group/DragonsLairTubes/
Plugins used: Xero-Radience can be downloaded here.

Now let's begin...
Open a new image 600x550 (We can crop if needed to later).
Open a paper from your scrapkit and flood fill it in Raster 1, I am using paper1 from the freebie kit that goes with this scrapkit.
Now apply your mask.
Layers merge your group and put a drop shawdow on your mask.
Now go to Radience with these settings

Now open frame 5 and resize to about 85 percent and drop shawdow.
Now using you magic wand click inside frame, modify by 4 and place your tube inside your fame, deleting anything outside of it, making it look like it is inside the frame.
Now beside the tube insert element blackjack and resize to about 40 percent and place beside tube.
remember to dropshawdow your tube and all elements.
Now open your red diamond and resize to about 25 percent and place on your frame,duplicate layer and then image mirror (for placing please use my tag as reference.)
Now do the same with bling 3 only physically place on frame each one.
Now on Bling 1 the only differnce is your gonnna duplicate layer 2 times and place by using the image mirror.
Now after you place them and drop shadow each use the radience settings before and apply to each bling, then add/remove noise and add some noise to make it look really good.
I used Random,monochrome checked 47.
Now once again pick a paper from the scrapkit and add your text, using font Passions Conflict size25.
Then use radience and add the noise like before.
Now merge visible and add the proper credits and your done.

Thanks for trying this tutorial, if you would like to show me your results feel free to either post in the group/ or e-mail me personally at carter_mandy@bellsouth.net


Tuesday, August 9, 2011

PTU Fall Friends

This tutorial was written by Amanda Carter on August 9th of 2011.  You have to have some knowlege of your graphics program to do this tutorial.

Supplies needed:
Graphic program of choice I am using Paint Pro Shop X3.
PTU Scrapkit by Karma located at Enchanted Dreams Boutique titled Fall Friends can be bought here
Frame of choice I will be using the frame from the scrapkit.
Mask of choice I am using a mask titled Leaf Panel Frame by essexgirl at this location
Font of choice, I am using Riesling at dafont.com, located at http://www.dafont.com/
Tube of choice I am using Suzanne Woolcott's The Black Star, you must have a license to use her work, you may purchase some of her work at http://www.gorjussarthome.com/store/index.php?main_page=account
Word art is from the scrapkit.
Special effects used xero Porcelin.


Now let's begin some fun!!!

Open new image 500x500, transparent.
Open the frame titled forever and place it as a new layer.
Click inside frame and modify,expand by 3, and then pick a paper add as a new layer and then invert, delete the paper that hangs outside of the frame, keep selected.
Now add your tube,change the tube to Luminace, and then select none.

now add your tube again somewhere near the frame.

Now were gonna add some elements....
Open element flower1 and resize by 25 percent and put on top of the frame, add a drop shawdow.
Open element pumpkin and resize and put on the top on the left corner and drop shawdow.
Now do the same with flower 4 and drop shawdow and place on the right corner of the frame and then duplicate it and put it on the lower left hand side of the frame.
Now were are going to go to raster one and select all, then pick a paper and put it in the selection and apply the mask, merge group.
Now we are gonna add some word art, go to your word art section in the scrapkit and pick a word art of your choice.
Now add your name and then were gonna use xero Porcelin with these settings....

Now that your done with the add your credits, and other things like that and your done thanks for doing this tutorial you may e-mail for questions or concerns, or just to show me your work!!